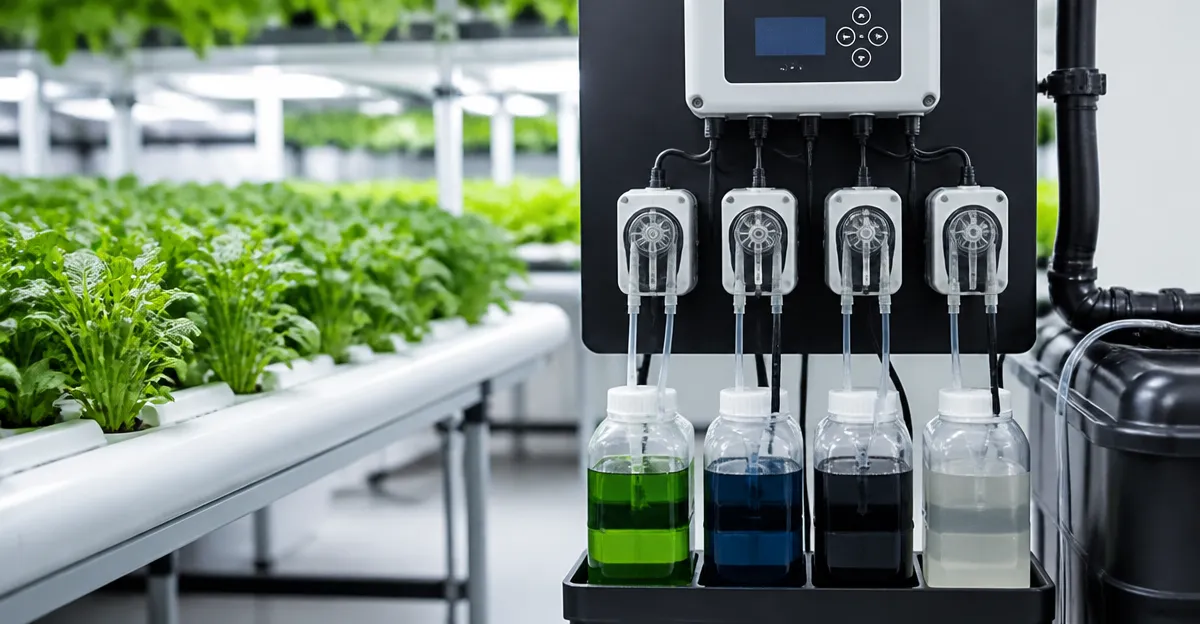
How to Set Up Automated Nutrient Dosing with Bluelab Guardian, Bluelab Dosetronic and Autogrow — A Step-by-Step Hydroponics Guide
Introduction
In modern hydroponics, precise control of pH, electrical conductivity (EC), and temperature is essential for maximizing yield and minimizing waste. This guide explains how to create an automated nutrient dosing system that continuously monitors and adjusts these parameters. By following the steps, one will achieve consistent plant health, reduce manual labor, and gain data-driven insight into the growing environment.
The process integrates reliable measurement devices with a programmable peristaltic pump, allowing nutrients to be added only when required. Readers will learn how to assemble the system, calibrate sensors, configure dosing schedules, and troubleshoot common issues. The information is valuable for intermediate growers who already understand basic hydroponic principles and wish to automate their operation.
What You’ll Need
- VIVOSUN 108-Site Hydroponic System – $111.99, 4/5 rating
- Bluelab pH Probe – $86.34, 4.4/5 rating
- AC Infinity Dosing Pump – $99.00, 4.5/5 rating
- Bluelab Combo Meter Plus – $288.89, 4.3/5 rating
- Bluelab OnePen 3-in-1 Meter – $249.00, 3.9/5 rating
- Standard garden tools (tweezers, scissors, zip ties)
- Distilled water for calibration
Step 1 – Assemble the Hydroponic Growing Platform
Begin by constructing the VIVOSUN 108-Site Hydroponic System. The kit includes PVC pipes, a water pump with timer, tubing, and planting baskets. Follow the provided assembly manual, connecting the 31.1‑inch PVC sections to create three vertical layers. Secure each pipe with the supplied zip ties to prevent leaks.
Why this product is useful: The system’s nutrient‑film technique (NFT) delivers a thin, continuously flowing film of nutrient solution, which is ideal for automated dosing because the solution is constantly refreshed. Its timer defaults to a 5‑minute pump run every 30 minutes, conserving energy while maintaining adequate flow.
Key specifications:
- 108 planting sites for leafy vegetables and herbs
- Food‑grade PVC for safety
- Included pump timer for easy flow control
- Price $111.99, rating 4/5 from 1,364 reviews
Step 2 – Install the Peristaltic Dosing Pump
Mount the AC Infinity Dosing Pump near the reservoir. Connect the pump’s inlet tubing to the reservoir’s nutrient solution outlet and the outlet tubing to a dedicated dosing line that returns to the reservoir. Ensure the line is sealed to avoid air bubbles, which can affect dosing accuracy.
Why this product is useful: The pump provides ten‑level precision dosing in 21 mL increments, allowing exact adjustments of pH buffers or nutrient concentrates. Its low‑noise DC motor operates efficiently, making it suitable for indoor environments where sound levels matter.
Key specifications:
- Flow rates from 21 mL to 210 mL per minute
- Compatible with AI and UIS controllers for Wi‑Fi programming
- Leak‑free peristaltic design ensures purity of the solution
- Price $99.00, rating 4.5/5 from 31 reviews
Step 3 – Deploy Measurement Instruments
Accurate data collection is the foundation of automation. Install the Bluelab Combo Meter Plus in the reservoir to monitor pH, EC, and temperature simultaneously. Position the probe so it is fully submerged but away from the pump inlet to avoid turbulent readings.
For quick spot checks, keep the Bluelab OnePen 3-in-1 Meter on a nearby workbench. Its Bluetooth connectivity allows you to log readings to the Edenic app, providing historical data that can be used to refine dosing schedules.
Why these products are useful: The Combo Meter Plus offers laboratory‑grade accuracy with automatic temperature compensation (ATC), ensuring that EC values remain stable despite temperature fluctuations. The OnePen’s IP68 rating makes it durable in humid environments, and its replaceable double‑junction pH probe extends lifespan compared with disposable strips.
Key specifications for the Combo Meter Plus:
- Three‑parameter monitoring (pH, EC/TDS, temperature)
- Auto‑off and low‑battery alerts
- Factory‑calibrated conductivity and temperature probes
- Price $288.89, rating 4.3/5 from 85 reviews
Key specifications for the OnePen:
- ±0.01 pH accuracy, rapid stabilization
- IP68 waterproof, floats for convenience
- Bluetooth data sync with Edenic app
- Price $249.00, rating 3.9/5 from 88 reviews
Step 4 – Calibrate the pH Probe and Conductivity Sensor
Calibration ensures that the sensors provide trustworthy data. Follow these steps:
- Fill a clean container with distilled water. Rinse the Bluelab pH Probe in the water to remove any residue.
- Place the probe in a pH‑4 buffer solution, wait for the reading to stabilize, then press the calibration button on the Combo Meter Plus to set the low point.
- Repeat the process with a pH‑7 buffer to set the high point. The double‑junction design of the probe reduces contamination, extending its lifespan.
- For conductivity, use the provided calibration solution (often 1413 µS/cm). Insert the conductivity probe, allow stabilization, and record the calibrated value.
Why the Bluelab pH Probe is essential: Its waterproof 6.56‑foot cable and double‑junction construction provide reliable readings even in nutrient‑rich solutions, outperforming test strips that can drift over time.
Key specifications:
- 2‑meter cable, fully waterproof
- Longer lifespan due to reduced contamination
- Price $86.34, rating 4.4/5 from 1,026 reviews
Step 5 – Program the Dosing Schedule
With sensors in place, configure the AC Infinity Dosing Pump to add nutrients or pH adjusters when thresholds are crossed. Use the pump’s Wi‑Fi app to set the following parameters:
- Target pH range (e.g., 5.8 – 6.2)
- Target EC range (e.g., 1.2 – 1.6 mS/cm)
- Dosing increment (choose a level that delivers 21 mL per dose for fine control)
- Interval between checks (e.g., every 15 minutes)
When the Combo Meter Plus reports a pH below 5.8, the app triggers a short burst of alkaline solution from the dosing pump. Conversely, if EC exceeds the upper limit, the system can add fresh water to dilute the solution. The pump’s ten‑level control ensures that each adjustment is precise, preventing over‑correction that could stress plants.
It is advisable to start with the lowest dosing level and observe plant response for 24 hours before increasing the volume. Record all changes in the Edenic app via the OnePen for later analysis.
Step 6 – Monitor, Log, and Optimize
Automation does not eliminate oversight. Review the data collected by the Combo Meter Plus and OnePen daily. Look for trends such as gradual pH drift or EC spikes after feeding cycles. Use the logged information to fine‑tune the dosing intervals and concentrations.
For example, if the EC consistently rises after each nutrient addition, consider reducing the concentration of the stock solution rather than increasing the dilution frequency. The ability to visualize historical data in the Edenic app simplifies this decision‑making process.
Regular maintenance includes:
- Rinsing the pH probe after each calibration
- Inspecting the peristaltic tubing for wear every month
- Replacing the probe storage cap if it becomes cracked
Tips & Pro Tips
- Place the probe away from direct pump spray to avoid turbulent readings.
- Use distilled water for all calibrations to prevent buffer contamination.
- Set the pump timer on the VIVOSUN system to a longer interval (e.g., 10 minutes) during the initial startup phase to allow the solution to stabilize before dosing begins.
- Enable Bluetooth syncing on the OnePen and keep the device firmware up to date for the latest data algorithms.
- Consider adding a small air stone to the reservoir to maintain oxygen levels, which supports healthy root development.
Troubleshooting
| Problem | Possible Cause | Solution |
|---|---|---|
| pH reading fluctuates wildly | Probe contamination or air bubbles | Rinse probe with distilled water, purge air from tubing, recalibrate. |
| EC reading stuck at zero | Conductivity probe not fully submerged | Ensure probe is immersed at least 2 cm, check battery. |
| Dosing pump does not activate | Wi‑Fi connection lost or tubing blocked | Reconnect to app, clear blockage, verify power supply. |
| Plants show leaf tip burn | Excessive nutrient concentration | Reduce stock solution strength, increase dilution frequency. |
Conclusion
By integrating the VIVOSUN 108‑Site Hydroponic System with the Bluelab measurement suite and the AC Infinity Dosing Pump, growers can achieve a fully automated nutrient management workflow. Precise calibration, thoughtful scheduling, and diligent monitoring create an environment where plants receive exactly the nutrients they require, leading to higher yields and reduced labor. The tools recommended herein provide reliability, accuracy, and scalability for both hobbyists and commercial operators.
Implement the steps outlined above, adapt the parameters to your specific crop, and enjoy the benefits of data‑driven hydroponic cultivation.
Frequently Asked Questions
What is the purpose of an automated nutrient dosing system in hydroponics?
It continuously monitors pH, EC, and temperature, adding nutrients only when needed to ensure optimal plant health and reduce waste.
Which devices are required to set up automated dosing with Bluelab?
You need a Bluelab Guardian (or Dosetronic) controller, compatible peristaltic pumps, and sensors for pH, EC, and temperature.
How do I calibrate the Bluelab sensors for accurate readings?
Follow the manufacturer’s steps: rinse the probe, use calibration solutions for pH and EC, and adjust the controller until the displayed values match the standards.
Can I program dosing schedules with the Autogrow system?
Yes, Autogrow lets you set thresholds and timing for nutrient addition, allowing the pump to activate automatically when parameters drift.
What are common troubleshooting steps if dosing stops working?
Check pump power and tubing, verify sensor connections, ensure the controller’s dosing mode is enabled, and re‑calibrate any drifted sensors.